Sign-In
Parks & Rec > Sign-In > Sign-In
The Sign-In process is designed to let you select the location you are working from, track location sign-in history, view usage-based memberships and deduct usages, view time-based memberships, view membership privileges and locations and print and link membership cards manually or with a scanner.
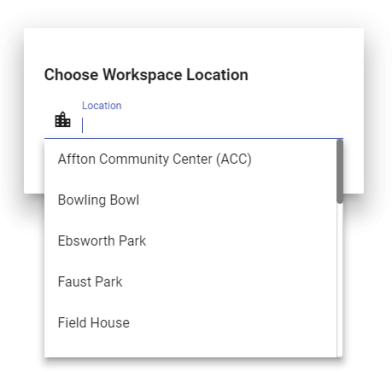
Clicking the Sign-In link opens a page that asks you to select the workspace location you will be signing members into.
Once you have selected a location, the main Sign-In page displays.
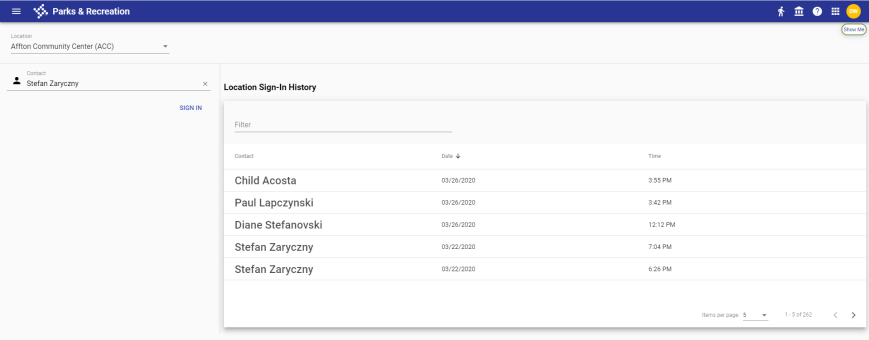
A Location Sign-in History displays in the right panel of the page, showing a list of the contacts who have signed in, along with the dates and times of sign-in.
Use the Filter field to focus the list. To sort the list by Contact, Date or Time, click the corresponding column header.
The left panel contains Location and Contact fields. The workspace location selected in the first step populates the Location field. If necessary, you may change the location by clicking in the field and selecting from a drop-down of available locations.
If a contact has a membership card, scan the card to navigate automatically to the Sign-in Details.
If a contact does not have a membership card to be scanned, click in the Contact field. The drop-down contains all contacts, sorted alphabetically by last name, who hold or have held at least one membership to any location in the system. Email addresses also are shown next to the contact names.
You may scroll and select the contact from the list or type the contact’s name in the field. As you type, the list of names filters accordingly.
Once you select the contact’s name, if Allow +1 is marked in Membership Setup, an ADD +1 (OPTIONAL) field displays to let you add the name of a second person:
Click the SIGN IN button.
On the following page, the right panel contains the sign-in details and a button for returning to the sign-in, and the left panel contains the contact's name and photo and buttons for viewing membership details and linking a new card.
Note: To review or edit contact information, click the contact's name to open the Contact Management page in a new tab.
When Sign-In Settings are disabled in System Settings, different icons denote usage- and time-based memberships. Usage-based icons show punch cards, while time-based icons show calendars.
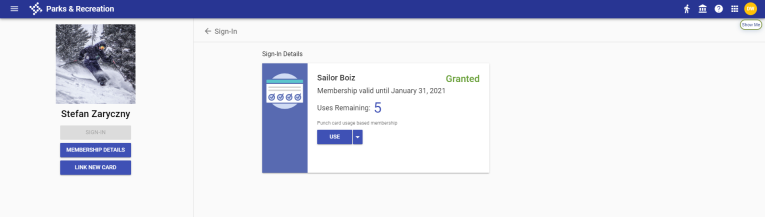
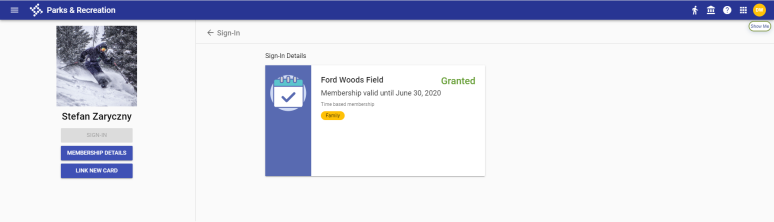
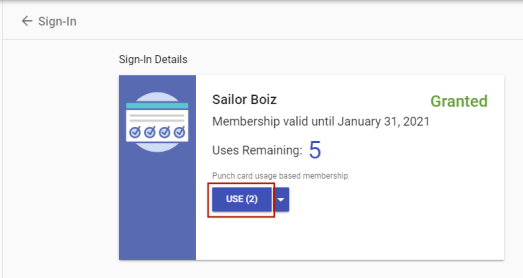
The Sign-in Details show the membership providing access to the location, the membership expiration date and the number of uses remaining. If the contact has multiple memberships, the one that expires first is shown, and usage is deducted from that one.
To deduct one use, click the USE button. To deduct multiple uses, click the prompt on the right side of the button, and select the number from the drop-down.

The number you select appears in parentheses on the USE button.
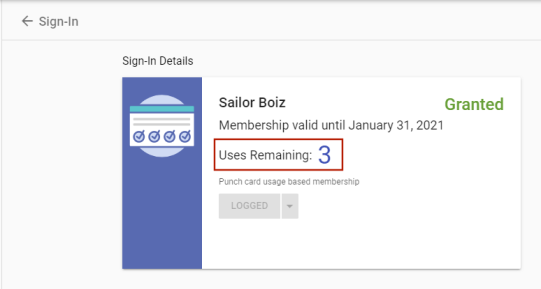
To deduct the uses, click the button. The name of the button changes to LOGGED and is disabled, and the number of Uses Remaining is adjusted accordingly.
If a membership provides unlimited access, the USE button and the number of Uses Remaining do not appear in the panel.
If Allow Sign-In Without Membership, Allow Class Attendance Tracking, or Allow Tracking Activities is enabled in the Sign-In Settings section of System Settings, an alternate Membership Sign-In page displays, allowing the user to select the memberships, classes or activities for which a contact is visiting a location.
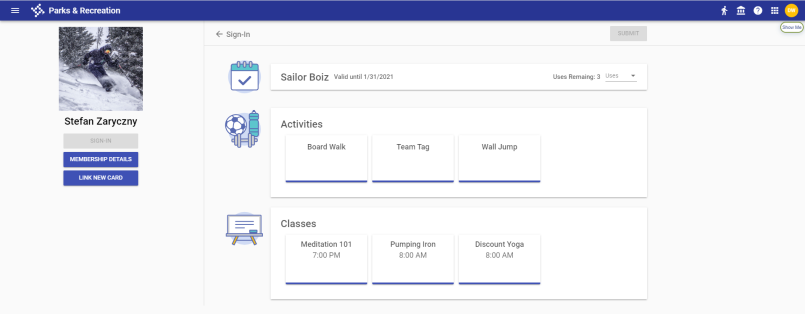
Memberships, classes and activities appear on individual cards. Select the appropriate cards, and click SUBMIT.

A message displays to confirm the sign-in.
To view a contact’s complete list of memberships and membership cards, click the MEMBERSHIP DETAILS button in the left panel.
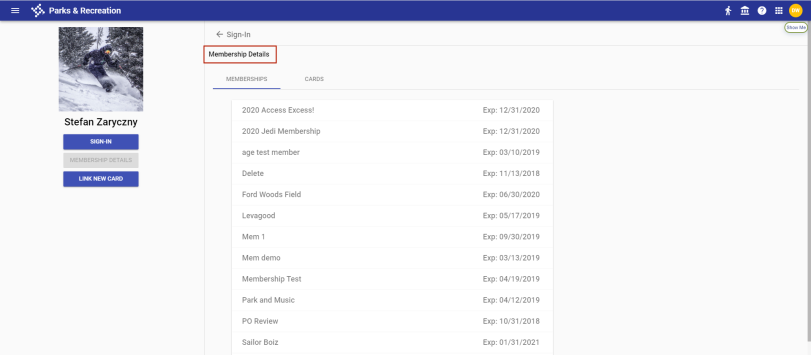
Memberships display on individual cards on the Memberships tab. To view the privilege and location associated with a membership, click the corresponding card to expand it.
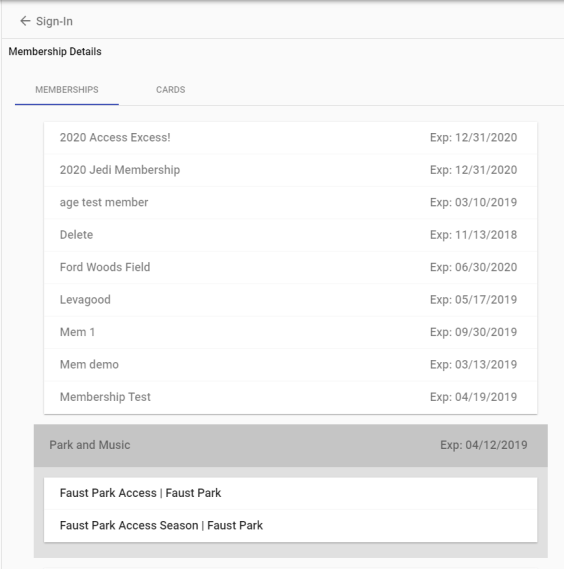
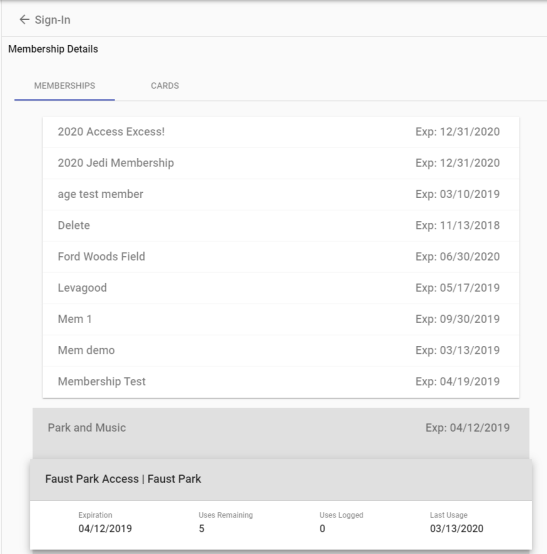
Privileges and locations also appear on individual cards. To view the expiration date, uses remaining, uses logged and the last use of a privilege, click the corresponding card to expand it.
Note: To set up the Membership Sign-In page to track class attendance, non-membership sign-ins or activities, see the System Settings page.
Membership card numbers and their issued dates display on the Cards tab.
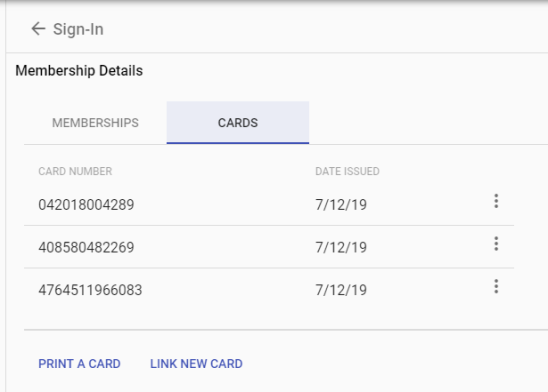
To remove a card, click the vertical ellipsis to the right of the expiration date, and select Remove.
Buttons to print a card and to link a new card are available at the bottom of the tab.
The PRINT A CARD button opens a pop-up containing the membership card.
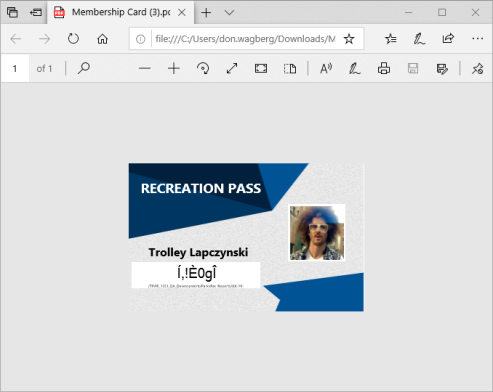
Click the Print icon  to open the PDF File-Print dialog.
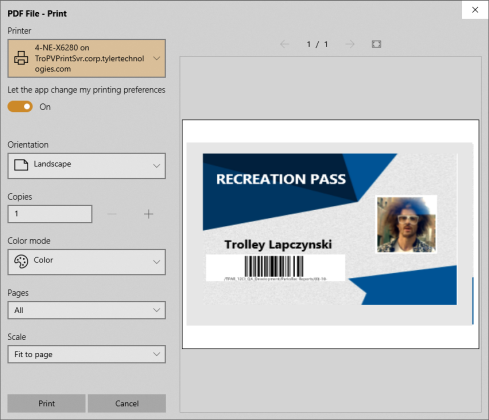
After making you selections on the dialog, click Print.
The LINK NEW CARD button opens a dialog for scanning or entering a card number for a card printed outside of Parks & Rec.
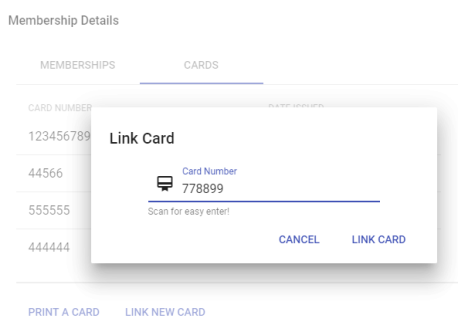
Note: Parks & Rec supports Membership cards distributed by third parties, such as Gym Assistant; however, Membership IDs must be a minimum of 6 characters to scan properly with a handheld barcode scanner. If Membership cards that contain fewer than 6 characters are ordered, consult the owner’s manual of your handheld barcode scanner to add a prefix or suffix to the scanned ID.